diumenge, 28 d’abril del 2013

Torronada de cigrons / Roasted chickpeas

Fa anys que segueixo fidelment la revista Cuina, i l'espai que li tenen reservat a la Carme Ruscalleda. Hi ha una de les seves receptes que, una mica tunejada, fa temps que repeteixo periòdicament... és fàcil, amb només tres ingredients i amb resultats espectaculars. Una recepta guanyadora, vaja!
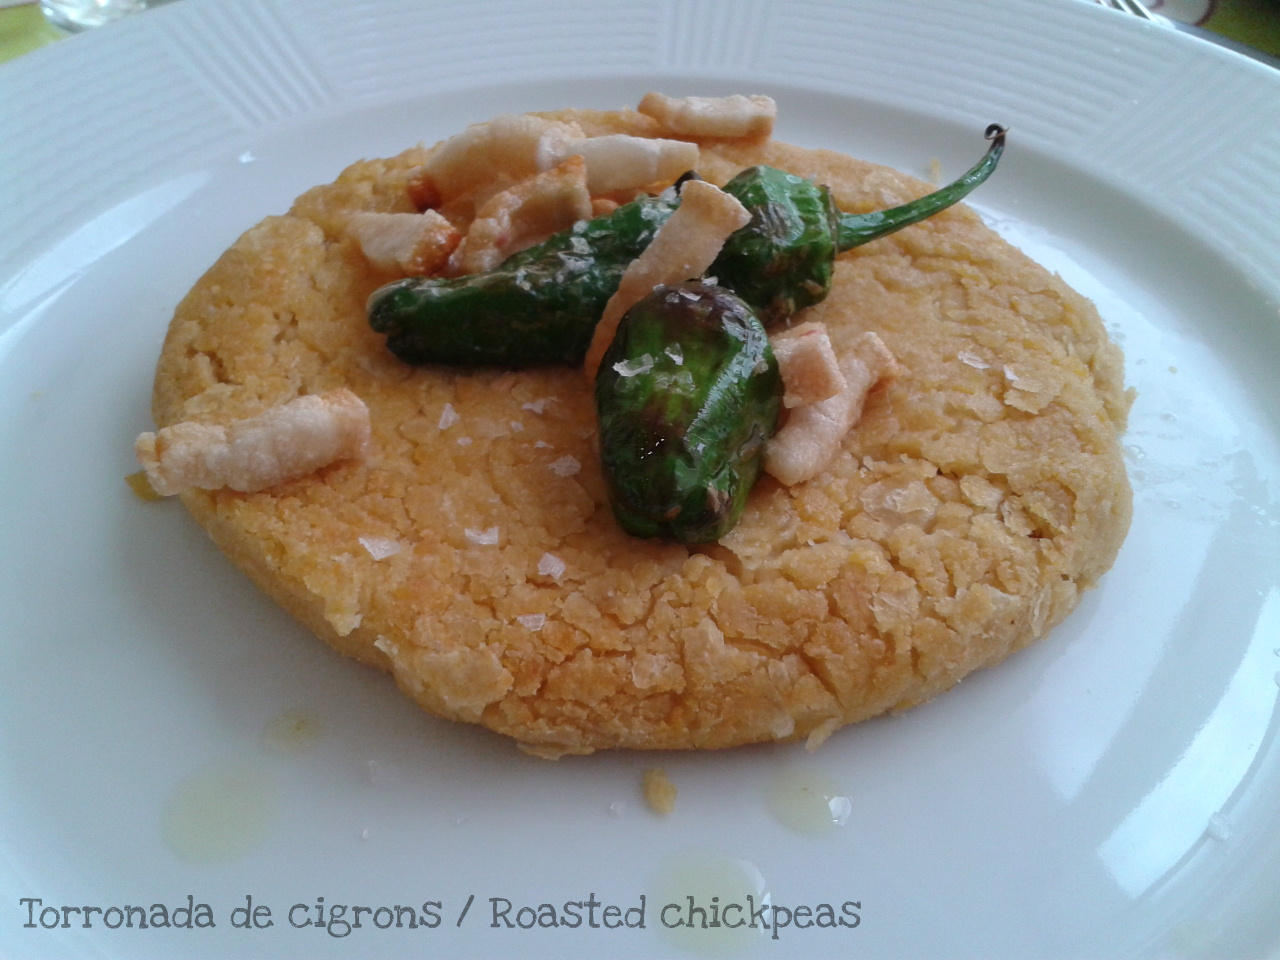
És la torronada de cigrons. A la recepta original, la Carme hi incorpora fetge de xai, però com a casa el fetge no ens va gaire, l'he substituit per cansalada de porc.
Aquí teniu la recepta...


Ingredients (per 4 persones):
  • 600 g de cigrons cuits
  • 4 talls de cansalada salada
  • 200 g de pebrots del padró
  • sal
  • oli d'oliva verge extra
Preparació:
  1. Talleu la cansalada a dauets. Salteu-la en una paella fins que enrosseixi. Reserveu la cansalada, conservant el greix que haurà deixat anar.
  2. Aixafeu els cigrons cuits amb una forquilla, fins aconseguir un puré rústic. Poseu-los en la paella amb el greix de la cansalada. Aneu-los saltant i aixafant a la paella, mentre els aneu donant forma de truita. Aneu-la tombant fins que quedi daurada per cada cara.
  3. Punxeu els pebrots, amb una agulla fina, poseu-los en una paella fonda, amb oli abundant, i fregiu-los 3 minuts. Reserveu-los sobre paper de cuina i saleu-los.
  4. Només falta emplatar la torronada amb els dauets de cansalada i els pebrots a sobre.

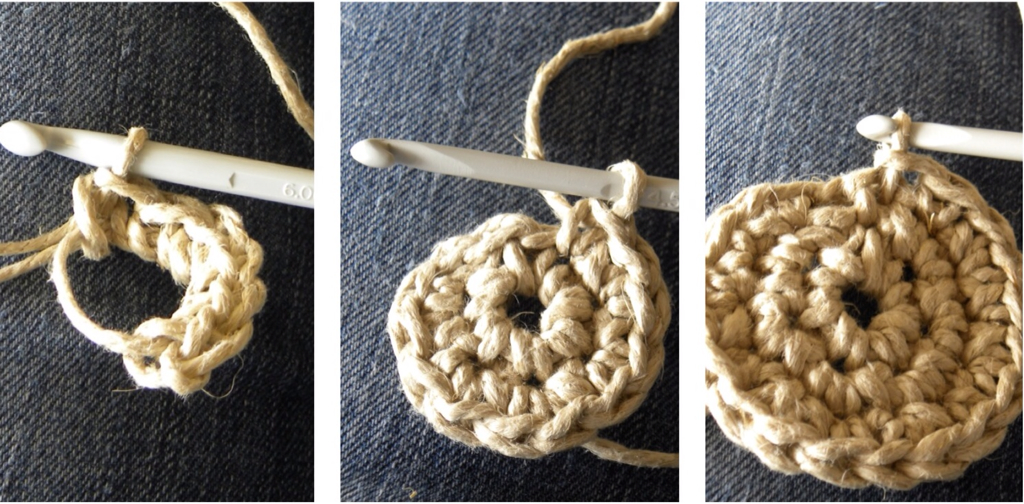
    Passos 1 i 2 / Steps 1 & 2
Espero que us agradi, i gràcies per passar per aquí!

----

I've been reading the catalan cuisine magazine Cuina for years now, and I specially like Carme Ruscalleda's recipes. I've made one of her recipes, with little changes, a dozen times... Roasted chickpeas are really easy to make, and with only three ingredients, but espectacular results. A winner!
The original recipe included lamb liver, but, as we don't like liver very much, I added bacon instead.
Here's the recipe:

Ingredients (yields 4):
  • 600 g chickpeas
  • 4 bacon slices
  • 200 g little green peppers
  • salt
  • olive oil
Instructions:
  1. Cut the bacon in tiny bits and brown them in a pan. Set the bacon apart, and keep the fat that it has released.
  2. Mash the chickpeas with a fork, and add them to the pan. Shape them as an omelette, and roast both sides of it.
  3. Pierce the peppers with a fine needle and fry them in a pan with olive oil for 3 minutes. Season with salt.
  4. Serve the chickpeas with the peppers and the bacon on top of them.
Hope you like it, and thanks for stopping by!

dimarts, 23 d’abril del 2013

Galetes per Sant Jordi / Celebrating Saint Georges' day with cookies

Ja fa dies que tinc ganes d'ensenyar-vos la recepta de galetes que vaig aprendre de la Su al seu Taller de pastisseria delicada... És fantàstica... bé les dues ho són... ella i la seva recepta! :P
Les galetes sempre se m'havien resistit, però aquesta recepta no falla mai!!! No dubteu en assistir a algun dels seus tallers a Terrassa, si en teniu l'oportunitat.
Bé, el tema és que, pensant en el detall que faria als meus companys de feina per celebrar el dia de Sant Jordi, em va semblar que aquesta podia ser una bona idea. Així que vaig córrer a buscar els materials necessaris!
Aquí en teniu els resultats... ja us diré si han tingut èxit!
Ingredients:
  • 150 g de mantega sense sal (pomada)
  • 75 g de sucre llustre
  • 250 g de farina
  • 1/2 culleradeta de cafè de sal
  • 1 culleradeta de cafè d'aroma (opcional)
  • 250 g de fondant vermell
Preparació:
  1. En un bol, bateu la mantega amb unes varetes elèctriques i aneu afegint el sucre llustre tamisat (a cullerades). Incorporeu l'aroma, si voleu.
  2. Amb una cullera de fusta, incorporeu la farina i la sal tamisades. Un cop ben integrada la farina, feu una bola, emboliqueu-la amb film de plàstic i deixeu reposar la massa a la nevera durant 1 hora.
  3. Entre dues fulles de paper sulfuritzat, estireu la massa de les galetes fins un gruix de 0,5 a 1 cm. Talleu les galetes i, amb l'ajuda d'una espàtula empolsinada amb sucre llustre, col·loqueu-les sobre una safata de forn. Claveu amb cura el pal per a broquetes.
  4. Feu coure les galetes a 170ºC durant 10-12 min, tot just fins que comencin a agafar un pèl de color.
  5. Deixeu refredar sobre una reixeta.
  6. Entre dues fulles de paper sulfuritzat, estireu el fondant fins un gruix d'uns 3 mm. Si teniu un texturitzador, disposeu-lo sobre el fondant i apliqueu pressió amb un corró. Talleu el fondant amb el mateix tallador que les galetes, i enganxeu-lo a sobre de cada galeta amb una pinzellada de melmelada de prèssec.
I només falta que les emboliqueu com millor us sembli! Jo he fet servir unes bossetes de cel·lofana, cinta verda i una mica de washi-tape amb les quatre barres...
Espero que us agradin!!
Mare, Sílvia... teniu la vostra esperant a casa! Muas! ;)
-----
I've been waiting to share this recipe with you for weeks... I learned it from Su, in one of her "Delicate bakery" workshops... She's great... Actually, both are... she and her recipe! LOL
I had always had problems with cookies, until her recipe!!!
The point is I was wondering what could I offer to my colleagues to celebrate Saint Georges' day, and this recipe seemed such a good idea. So I ran to buy the necessary ingredients!
Here you have my results... hope my colleagues will enjoy it!
Ingredients:
  • 150 g unsalted butter (softened)
  • 75 g confectioners' sugar
  • 250 g wheat flour
  • 1/2 tsp salt
  • 1 tsp desired flavoring or extract (optional)
  • 250 g fondant icing (red)
Instructions:
  1. In a bowl, beat the butter and add confectioners' sugar, one tablespoon at a time. Add flavoring or extract, if desired.
  2. Using a wooden spoon, add the flour and salt, sifted. Once well incorporated, knead a bit and wrap up with plastic wrap and refrigerate for one hour.
  3. Roll the dough out to 0,5-1 cm thick. Cut the shapes and place them on a baking sheet. Insert the skewer carefully.
  4. Bake at 170ºC (340 F) for 10-12 minutes, just until beginning to turn golden around the edges.
  5. Cool on wire racks.
  6. Roll the fondant out to about 3 mm. Cut the shapes and stick them to the cookies with a bit of jam.
And it only rests to wrap the cookies...
Hope you like them!!!

diumenge, 21 d’abril del 2013

CAL Manteta Vasarely #2 / CAL Vasarely Blanket #2

Avui és dia 21, així que toca reportar els meus progressos amb la manteta del CAL Vasarely organitzat per Le Blog Purple...

Bé... només us diré que hauria d'haver fet 35 rombes... i que no tinc 35 rombes... però us prometo que tinc una bona excusa!!! :P

Després de portar-ne fets com una dotzena, fa 10 dies vaig decidir canviar el tipus de llana que estava utilitzant i he hagut de tornar a començar des de zero...

I ens aquests 10 dies he fet 23 rombes! Vist així, no porto mal ritme... tenint en compte que només ho faig entre setmana! espero haver-me posat al dia ben aviat!

La major part dels rombes els faig aprofitant els viatges en tren per anar a treballar, però el que encara no he fet és començar a unir-los... Les que aneu més avançades, teniu algun consell? Feu servir la mateixa llana que per fer els rombes?? I una agulla de tapisser??

Bé, ens tornem a trobar el proper 8 de maig amb 53 rombes!

...però abans, una pregunta per a les companyes franceses! A finals de primavera volem visitar la zona d'Aix-en-Provence, teniu alguna recomanació dels llocs més interessants per visitar?

Moltes gràcies!!

-----

Today it's the 21st, so I should report my progress on the CAL Vasarely blanket from Le Blog Purple...

Well... I'll only say that I should have crocheted 35 diamonds by now... and I haven't... but I swear I have a good excuse!! LOL!

After having crocheted a dozen diamonds, 10 days ago I changed my mind about the yarn I was using... And I've started once again from the very beginning...

Since then I've crocheted 23 diamonds! Quite fast, I think... taking into account, that I only crochet on weekdays! I hope I'll catch the rest of crocheters pretty soon!

I do crochet most of the diamonds during my commutes, but I haven't started joining them... Any advice from the more advanced ones? Are you using the same yarn to join than the one to crochet the diamonds? And a tapestry needle??

Ok, see you on the 8th of May, with 53 diamonds!


...but let me ask something to my french CAL colleagues! We'll be visiting the Aix-en-Provence area by the end of spring, could you recommend us the most interesting places to visit?

Thank you very much!!


dimecres, 17 d’abril del 2013

Mussol de ganxet per The Serial Crocheteuses / Crochet owl for The Serial Crocheteuses

Un post molt curtet per ensenyar-vos la meva participació a The Serial Crocheteuses núm. 165!
El tema d'aquesta setmana és un petit amigurumi per una caixa de llumins. L'organitza la mateixa Isabelle Kessedjian i trobareu a les diferents participants al museu.
De part meva... un mussol i el seu niu!!!


Què us semblen???? :P

I ara torno corrents a la manta del CAL Vasarely, que diumenge hem de tornar a passar revista!!!!!
-----
A really brief post, only to show you my participation in The Serial Crocheteuses #165!
This time Isabelle Kessedjian asked us to create a little amigurumi to fit a match box. You'll find all the projects in the museum.
My project... a little owl in his nest!!!!


What do you think about it???? :P


And now, back to my CAL Vasarely blanket... next Sunday I should be posting my progress again!!!!

diumenge, 14 d’abril del 2013

Pancakes de poma amb canyella / Apple cinnamon pancakes


M'encanten els esmorzars de diumenge... Si ens hem quedat a casa el cap de setmana, la meva parella acostuma a llevar-se primer i treu a passejar a la nostra gosseta, i jo, mentre em dutxo, vaig maquinant el menú de l'esmorzar... torrades amb melmelada casolana, o gofres, o bikinis... i fa un parell de diumenges: pancakes!


Havia vist la recepta d'en Jordi Roca repassant un número endarrerit de la revista Cuina i la foto feia venir salivera a l'instant, així que estava desitjant provar-la! Com sempre, hi vaig fer alguns canvis menors: la recepta original porta pera enlloc de poma i xarop d'auró enlloc de mel...

El resultat, un èxit total!!! Les mides per a dues persones són força complertes, però no en vam deixar ni una engruna!!!

Ja em direu què us semblen!!


Ingredients (per a 2 persones):

- Per als pancakes:

  • 125 g de farina
  • 1/2 culleradeta de bicarbonat
  • 3 ous
  • 150 ml de llet
  • 25 g de mantega
  • 10 g de mantega

- Per al farcit:

  • 2 pomes
  • una mica de mantega
  • canyella en pols
  • mel

Preparació:

- Per als pancakes:

  1. Separeu els rovells i les clares dels 3 ous. Barregeu els rovells amb la llet i afegiu la farina i el bicarbonat.
  2. Foneu els 25 g de mantega i afegiu-los poc a poc a la mescla anterior.
  3. Munteu les clares a punt de neu i afegiu-les amb moviments suaus.
  4. En una paella antiadherent, poseu els altres 10 g de mantega i, quan estigui fosa, afegiu-hi dues cullerades soperes de massa, aproximadament.
  5. Passat un minut, quan comencin a daurar-se les vores, doneu la volta al pancake i deixeu-lo coure un minut més de l'altra banda.
- Per al farcit:
  1. Peleu les pomes i talleu-les a dauets.
  2. Salteu-los en una paella amb mantega i un polsim de canyella en pols.
  3. Serviu els pancakes amb els dauets de poma i un rajolí de mel per sobre.

-----


I love Sunday breakfasts... If we are at home, my boyfriend usually wakes up first and goes for a walk with our sweet dog. Meanwhile, I take a shower and start planning the menu... toasts with homemade jam, or waffles, or cheese grilled sandwiches... and two weeks ago: apple cinnamon pancakes!

I saw Jordi Roca's recipe some time ago in a Cuina's magazine, and the mere sight of the picture made my mouth water, so I added it to my 'to do list'! As always, I made some minor changes to the original recipe: apple instead of pear, and honey instead of maple syrup...

The results, a total success!!! The ingredients yield 2 generous servings, but we ate every single bite of them!!!

What do you think about it??


Ingredients (yield 2):

- For the pancakes:

  • 125 g wheat flour
  • 1/2 teaspoon baking soda
  • 3 eggs
  • 150 ml milk
  • 25 g butter (melted)
  • 10 g butter

- For the filling:

  • 2 apples
  • butter
  • cinnamon
  • honey

Instructions:

- For the pancakes:

  1. In a bowl, mix the 3 eggs' yolks with the milk. Add flour and baking soda.
  2. Keep mixing and add the melted butter, slowly.
  3. Whisk whites until stiff and add to the previous batter, gently.
  4. Melt a bit of butter in a pan.
  5. Cook 2 tablespoons of the batter in the pan, one minute each side (or until sides became lightly brown).


- For the filling:

  1. Peel the apples and dice them in tiny bites.
  2. Cook them in a pan, with butter and ground cinnamon to taste.
  3. Serve the pancakes with the apple and some honey on top of them.


dilluns, 8 d’abril del 2013

CAL Manteta Vasarely #1 / CAL Vasarely Blanket #1

Definitivament... estic com una cabra... si, si...

La setmana passada em vaig apuntar a participar al CAL Vasarely Blanket!!

Que què és un CAL o Crochet-along?? Doncs una mena de quedada entre "ganxetaires" per teixir alhora la mateixa peça de ganxet.

Jo no tenia idea de què eren fins que vaig veure aquest post de l'Isabelle Kessedjian, on conjuntament amb la Marie-Line de Le blog Purple, ens proposen teixir una manta de ganxet amb un motiu basat amb els treballs del dissenyador Víctor Vasarely... si ja sé que, explicat així, potser no convida gaire a agafar el ganxet... però en veure aquesta mostra de la manta que està teixint l'Isabelle, no vaig poder-me resistir a apuntar-m'hi!


És el primer projecte tan gran que faig... la manta fa 1,20 x 2 metres!!! I l'hem d'acabar pel proper 21 de desembre... i sembla molt temps, fins que llegeixes el tutorial i t'assabentes que la manteta està feta amb 300 rombes!!!

En resum, que, a partir d'avui, els dies 8 i 21 de cada mes, anireu veient l'evolució de la meva manta...

De fet, avui toca el primer "lliurament"... i jo ja faig tard!!! Aquí teniu els meus inicis...


A veure què ha fet la resta, però jo ja em puc anar posant les piles si vull atrapar-les!!! =O


-----

Definitely... I've completely lost my mind... yep...

Last week I decided to participate in the Vasarely Blanket CAL!!!

Do you know what a CAL or Crochet-along is? It's basically a group of people all working on a large project at the same time and pace.

I knew nothing about CALs until I read this post of Isabelle Kessedjian. She and Marie-Line, from Le blog Purple, suggest us to crochet a blanket inspired in the work of the designer Victor Vasarely... I know, at this point you may not find it very engaging... but at the very moment I saw the blanket Isabelle is working on, I knew I wanted one for me!!!


It's the first time I work on such a big project... the size is 1,20 x 2 meters!!! And it's due to be finished on the 21st December... it may seem such a long time, but you need to crochet 300 diamonds!!!

That means that, starting today, on the 8th and 21st every month, I should be posting my progress...

Actually, today it's the first term... and I'm late already!!! Here you have my first diamonds...


I'll need to work harder if I want to catch the rest of the crocheters!!! OMG!!!


dimarts, 2 d’abril del 2013

Cistells de ganxet amb corda / Twine crocheted baskets

Per fi he acabat els cistells!! Aquests cistells formen part del projecte que tinc pensat pel nostre rebedor i que ja us aniré ensenyant... la intenció és penjar-los a prop de l'entrada per tenir a mà, però endreçades, les claus, els guants, els mocadors i coses per l'estil... per això hi he inclòs una petita nansa.

Com que volia donar-los un aire rústic, he triat un material una mica diferent... He estat provant diferents tipus de corda i cordill i, al final, m'he decidit pel cordill de cànem. Aquest és menys aspre i més fàcil de treballar que altres materials que he provat aquests dies. A més, he afegit fil de cotó a les voltes finals, per donar-li un toc diferent.

Aquest és el patró que he fet servir, per si el voleu provar:

Materials:

  • Cordill de cànem
  • Cotó del color que es desitgi
  • Ganxet de 4,5 mm
  • Agulla de tapisser per rematar
Abreviatures:
  • cd - cadeneta
  • pr - punt ras
  • pb - punt baix
Patró:
  • Volta 1: anell màgic amb 6 pb, tancar la volta al 1er pb, 1 cd
  • Volta 2: 2 pb a cada punt, tancar, 1 cd (12)
  • Volta 3: *2 pb, pb al punt següent, repetir des de * fins al final de la volta, tancar al 1er pb, 1 cd (18)
Voltes 1, 2 i 3 / Rounds 1, 2 & 3

  • Volta 4: *2 pb, pb, pb, repetir des de * fins al final de la volta, tancar al 1er pb, 1 cd (24)
  • Volta 5: *2 pb, pb, pb, pb, repetir des de * fins al final de la volta, tancar al 1er pb, 1 cd (30)
  • Volta 6: *2 pb, pb, pb, pb, pb, repetir des de * fins al final de la volta, tancar al 1er pb, 1 cd (36)
  • Volta 7: pb en tota la volta treballant només al llaç posterior, tancar al 1er pb, 1 cd (36)
Volta 6 i detalls de la volta 7 / Round 6 and details of round 7

  • Voltes 8-16: pb en cada punt, treballant en espiral (sense tancar les voltes)
  • Volta 17: afegir el fil de cotó al cordill de cànem i fer pb en tota la volta
  • Volta 18: 8 cd a l'aire, pb a la resta de punts de la volta
  • Volta 19: 8 pb sobre la cadeneta anterior, pb a la resta de punts de la volta, 1 pr per acabar. Rematar.


Espero que us agradin, i gràcies per la visita!!

-----

Finally, my baskets are ready!! They're part of a project for my entryway I'm working on, I'll show you more of it soon... I'd like to hang them near the entry to keep handy, but organized, our keys, gloves and the like... that's why I've added a little handle to each basket.

I wanted a rustic look for the baskets, so I've chosen a slightly different material... After trying several kinds of rope and twine, finally I've used hemp twine. It's not as harsh and it's easier to work with than the other materials I've tested these days. I've added too cotton yarn to the final rounds, giving them a twist.

Just in case you want to give it a try, here you have the pattern for these baskets:

Supplies:

  • Twine
  • Coton yarn in the desired color
  • Crochet hook size 4,5 mm
  • Tapestry needle for weaving in ends

Abbreviations:

  • ch - chain
  • sl - slip stitch
  • sc - single crochet

Pattern:

  • Round 1: Magic ring, 6 sc inside ring, joint to 1st sc, chain one
  • Round 2: 2 sc in each stitch, join, chain one (12)
  • Round 3: *2 sc, sc in next stitch, repeat from * around, join to 1st sc, chain one (18)
  • Round 4: *2 sc, sc, sc, repeat from * around, join to 1st sc, chain one (24)
  • Round 5: *2 sc, sc, sc, sc, repeat from * around, join to 1st sc, chain one (30)
  • Round 6: *2 sc, sc, sc, sc, sc, repeat from * around, join to 1st sc, chain one (36)
  • Round 7: sc around working only in the back loop, join to 1st sc, chain one (36)
  • Rounds 8-16: sc in each stitch, working in the round (no join)
  • Round 17: add a thread of coton yarn to the twine and sc in each stitch
Volta 17 / Round 17

  • Round 18: 8 ch, sc until the end of round,
  • Round 19: 8 sc over the previous round chain, sc until the end of round, 1 sl to end.
Voltes 18 i 19 / Rounds 18 & 19

Hope you like it, and thank you for stopping by!!